|
Home |
Tutorial |
Site Settings |
Set Up Localities |
Link Manager |
Edit Page Content |
Manage Business Directory |
Add a Listing |
Add/Delete Categories |
Marketplace/Classifieds |
Banner Ads |
Business Card Billboard |
Create a Forum/Blog |
Commission / Affiliate |
Billing |
Mailing List |
Email All Members |
Compact & Repair Databases |
Logout |
Welcome to
the YourCityGuide.net Tutorial!
When you
make changes to your site, if you don't see them immediately
don't forget to hit the "REFRESH" or
"RELOAD" button on your browser
|
GETTING STARTED:
There are a few
things you should do before proceeding with marketing the site and
selling listings. Make sure you complete this list as soon
as possible.
-
Sign up for Paypal
(if you haven't already) - It's free! Plus it is your
means of accepting credit cards. Just go to
www.paypal.com and get a
business account. Then be sure to verify the email address
you use with paypal, with your email address on file under "Edit
Site Settings"
-
Verify Site Settings
- In the site manager menu, click "Edit Site Settings". Be sure
that all information is correct, set your listing prices, setup
your 'In the Spotlight' site. Especially be sure that
the Paypal address is the valid email address you have set up on
your Paypal account or customers will not be able to properly pay.
-
Set
up an @yourdomain.com e-mail account (if desired) -
If you would like to create an
email address for your website (ex. support@yourdomain.com) it is
easy to do so. Just browse to
http://mailadmin.yourdomain.com , where you replace 'yourdomain.com'
with your actual domain name. Then login using the following
info:
u: admin@yourdomain.com (replace yourdomain.com with your
domain name)
p: your site manager password
After logging in, click on "Mailboxes" and then "Add New" (below
the current mailboxes on the right). Fill out the form
with the desired email and password. If you wish to redirect
the email sent to this address to your current email for
convenience, tick the box and enter your current email.
Otherwise, just set up as normal.
If you are setting up the email in your email client, use 'mail.yourdomain.com'
as both the POP and SMTP (Incoming and Outgoing) server and use
the full email address (newemail@yourdomain.com) as the username,
and the password you set up as the password. This should
allow you to send and receive email to and from your new address.
-
Set Banner Ad Prices
- There are many banner spaces on your website you can sell to
earn additional income. Click "Manage Banner Ads" and set the price of each banner.
Don't change the banner or links until you sell a banner as they
will help you sell them.
-
Sign
up for Commission Junction - Your
website is programmed to earn you additional money without doing
anything. All you have to do is sign up for a free
Commission Junction account and input your CJ ID in your site
settings. Click on the "Commission / Affiliate" link for
full instruction.
|
|
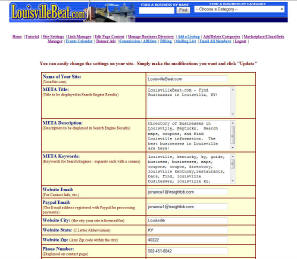
EDIT YOUR SITE SETTINGS:
To edit general settings such as your email
address, phone number, price for your site and more...just click
on the "EDIT YOUR SITE SETTINGS" link. Be sure all
information is correct and edit anything you need to edit before
submitting the form. There is a short description of each of
the fields in the form to help you out.
 |
|
LINK MANAGER: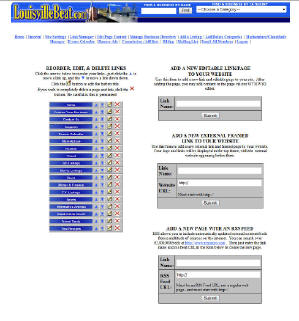
REORDER, EDIT, AND DELETE LINKS
The links on your website are able to be reordered
how you like them. Just click the
▲
to move a link up, and the
▼
to move a link down down. Click the
 button to
edit the button title. button to
edit the button title.
If you wish to completely delete a page and link, click the
 button. Be careful as this is permanent!
ADD A NEW PAGE TO YOUR WEBSITE
You can also add new pages and links to your
website. This is one of the most important features of
your website, as it gives you the opportunity to personalize your
site for your community. Add as many pages as you would
like. There are 3 types of pages you can add to your
website:
-
"Editable Link/Page"
- Use this if you want to add a blank page to your website that
you can add content to using the WYSIWYG Editor (What You See Is
What You Get). If functions just like Microsoft Word and
allows you to customize your text size, color, add pictures, and
more. (see the next section of the tutorial for more info on the
WYSIWYG Editor). Want to add a "Community Pictures" page?
Just use the "Add Editable Link/Page" form to enter the Link Title
and it is created instantly. Then just click the "Edit Page
Content" link (next in the tutorial) to use the WYSIWYG editor to
add content. You can create a page about anything,
user your imagination...content only makes your website better.
"External Framed Link"
- Use this form if you want to add a link to any external website.
An external website is any website that isn't yours, for example
the local Chamber of Commerce or local Visitors Bureau website.
When you add a link using this method, it will display your logo
and links at the top of the page, and display the external page in
a frame below them. This serves the purpose of allowing the
user to browse the external site, but still keeping them on your
site and allowing them to navigate back if they choose. No
sense driving them away...right?
"RSS Feed Page"
- The last kind of new page you can add to your site sounds
complicated, but it really is not. It is called an RSS Feed
Page. An RSS feed is basically a data stream that is
provided by certain websites (local newspapers often offer them)
that you can display within your existing website design and they
appear as part of your website. They are constantly
updated by the provider so you have fresh content on your website
and don't have to do anything. The news and recipes on your
homepage are examples of RSS feeds. I've given you the
opportunity to add RSS Feed pages to your site as well.
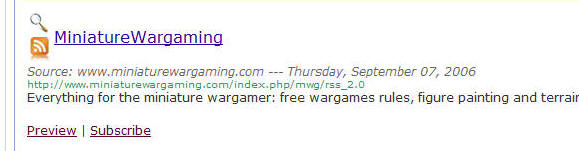
It's easy to find RSS Feeds...just go to
http://www.rssmicro.com and find a feed you want to add to
your website. When you find the one you want, just copy the
green url
(including the http://) - see screenshot below. Then paste
it into the Add RSS Page form in Link Manager. Add your Link
Title, submit and you're done.
|
|
EDIT PAGE CONTENT:
This is where you will edit the content
on the pages of your website. Just click the
title of the page you wish to edit and you will be taken
to the editing page.
WYSIWYG Page
- This method uses the "What You See Is What You Get"
Editor (shown below). It is very easy to use and
operates like Microsoft Word or other word processing
software. You can edit text size, color, insert
pictures, and more. The text on your homepage is
editable in the WYSIWYG Editor, as is any new page that
you set up as an editable page. We have put a
Quick Reference Table for the WYSIWYG Editor button on the
editor page, but you can also
Click here for Flash Tutorials and Button Explanations
for the WYSIWYG Editor
External Link & RSS Feed Pages - When you
edit these pages you are actually just editing the URL of
either the external link or the RSS Feed. Click the
link title you want to edit and on the next page you can
edit the URL. Be sure to only edit
the link portion of the above full URL:
Examples: frames.asp?url=http:// www.yoursite.com
(Only edit the part in red)
rss.asp?url=http://www.yoursite.com
(Only edit the part in red)
|
|
MANAGE BUSINESS DIRECTORY:
This section allows you
to review submissions waiting for approval plus view, edit, and delete all of the listings already appearing on your site.
You can also easily contact any of your members from this page by clicking their email address.
Pending Featured Listings
Review
- Once
you have verified that payment has been received, log into site
manager and click "Review" next to the listing you would like to review and/or activate.
Verify all information, enter a listing expiration date, etc...then
submit the form make the listing go "Live" on your website.
Delete
- Click this button only if you want to permanently delete this submission from the queue. CAREFUL...THIS CANNOT BE UNDONE!
Active Featured Listings
Auto E-mail
- Use this feature to resend the confirmation email containing a
customers username and password. A quick and easy
way to get that information to someone who has lost their
username and password information or didn't receive the first
e-mail.
Edit
- To Edit one of the listings, just click the "Edit" button to the
right of the listing you want to edit. You will then be
taken to a form that will have all of the listing information in a
form for you. Just edit the information you want to change
and click "Update". It will instantly be updated in the
listing.
Delete
- To Delete a listing from your site, all you need to do is click
the "Delete" button next to the listing you want to
delete. It will ask you "ARE YOU
SURE YOU WANT TO DELETE THIS LISTING?" Either click
"OK" to delete it or "CANCEL" to cancel the
deletion.
Non-Featured Business Listings
This
area allows you to edit/delete the Non-Featured Yellow Page
Listings on your website in case the need ever arises.
Just enter all or part of a business name into the search box
and submit. You will see a listing of matching businesses,
along with Edit and Delete buttons just like with the Featured
Businesses.
|
|
ADD A NEW LISTING:
If you sign up a business in person, or for any
other reason need to add a business yourself, simply use this
feature to do so. There is also an option to add a free
yellow page listing.
|
|
ADD/DELETE CATEGORIES:
Allows you to review your
website categories, add new ones if needed, and delete existing
categories. Generally speaking most businesses should fall
into the existing website categories, but this gives you the
option if you feel the need to add a new one.
|
|
MARKETPLACE / CLASSIFIEDS:
This is where you manage the items for sale posted
on your website. You can view all items posted by both
Featured Businesses as well as Free Classified users. Just click on "Manage your Marketplace" to go to
Marketplace manager. You will see a listing of items in your marketplace.
To delete an objectionable, fraudulent or out of date listing,
just click 'Delete' next to the item in question.
Click an item name to view the full item description page.
Finally, if you want to view or delete a Free Classified user for
any reason, just use the link provided.
|
|
BANNER ADS
Another profit generating feature on your website is the ability
to sell banner advertisements. Your website is already
preloaded with banner ad spaces ready to sell. Banner Ad
Manager allows you to upload advertiser banners, set prices for ad
space, even create your own banners online.
ONLINE BANNER MAKER
There is a link at the top of Banner Ad Manager to Create your own
banners. Use the online banner maker to create
impressive banner ads for your clients. You can preview the banner
as you go, and finally save it to your hard drive when finished so
you can upload it to your website.
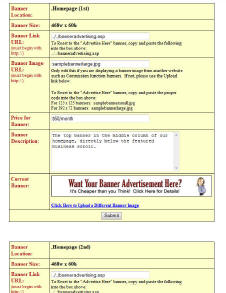
UPLOADING A NEW BANNER IMAGE
In Banner Ad Manager you will see a form for each banner on your
website. At the top is a description of where the banner is
located (ex. Homepage 1st or Business Directory Bottom).
Find the location you would like to upload a new banner to, and
click the "Click Here to Upload a Different Banner" link.
You will be walked through the banner upload process. Be sure the
banner image you upload is the correct size.
CHANGING THE PRICE OF A BANNER
You obviously have complete control over the pricing of your
banners. I have set default prices which you can feel free
to use or change to your liking. If you would like to
change the price of a banner, simply scroll down to the location
you would like to change, edit the price, and submit the form.
RESETTING THE "ADVERTISE HERE"
BANNER
If you have uploaded a banner ad and would like to display the
"Advertise Here" banner again, simply follow the instructions in
the Banner Link URL and Banner Image URL boxes and submit the
form.
|
|
COMMISSION / AFFILIATE:
Earn Money the Easy Way!
We have preloaded your website with several affiliate programs
designed to earn you a commission if someone clicks through from
your website and makes a purchase. All you have to do is
sign up for the free program! Plus we give clear
instructions on how to sign up for new affiliate programs and add
their banners or create links on your website. Visit the
Commission / Affiliate link for detailed instructions.
|
|
BILLING:
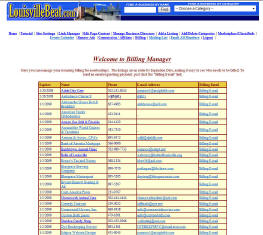
Billing Manager allows you to
view the expiration date of all your Featured Businesses.
We've made it easy for you to track the status of your Featured
Businesses, and have even provided a "Billing E-mail" link to send
expired businesses, or businesses whose Paypal payments have been
cancelled, a billing notice. Just click that link, and on
the next page, we've pre-populated a form. You can just hit
send, or change the wording if you wish. Upon submitting the
form, the business will be e-mailed the notice containing a link
for them to renew their subscription.
|
|
MAILING LIST:
Keep up with your website
visitors and keep them coming back! Your website comes with
a mailing list signup form in the right hand column of every page
on your website. Use the mailing list manager to view your
members and send out emails to all of them. Use the
same username and password to login to Mailing List Manager as you
do to access your Site Manager.
|
|
E-MAIL ALL MEMBERS:
If you want to e-mail all of the
members of your website at one time, we have made it easy for you.
Simply click the "Email All Members" link. On the next page
is a text box containing the e-mail addresses of all the Featured
Businesses on your website. Simply highlight them, copy, and
paste them into your favorite e-mail client (Outlook, Outlook
Express, Eudora).
|
|